There is no right or wrong way to clean your AR-15. There are, however, correct steps that you must take to ensure a clean and functioning firearm. If you are new to cleaning an AR-15, then it might seem daunting. It breaks down very simply, and without the use of tools.
In this article, we will be going over how to maintain your AR-15. All of the steps for cleaning your AR-15 will be universal, regardless of whether you bought it or built it. If you have any questions, please feel free to reach out to us or check out our AR-15 Instructional Mats!
R-15 Cleaning Kit Checklist: What You’ll Need
The following items are the bare minimums that you will need to maintain your AR. You are going to need to grab a cleaning kit with a cleaning rod, some brushes, cleaner and solvent, and gun oil. Another option for your cleaner can be our CLP. This will depend on your personal preference. You can’t forget the most important part, though, your Cerus Gear mat. Most kits that you can find at local sporting goods stores or gun ranges should have these supplies, but it is good to double-check before you start.
You should always treat a firearm like it is loaded and double-check that the chamber is clear and that the magazine has been removed from the gun. Even if you have been around firearms for years, don’t let a second of carelessness ruin the rest of your day or your life. We recommend putting any ammo outside of your workspace so you don’t accidentally grab it. Once the gun is clear and you have all the supplies, you are ready to start.
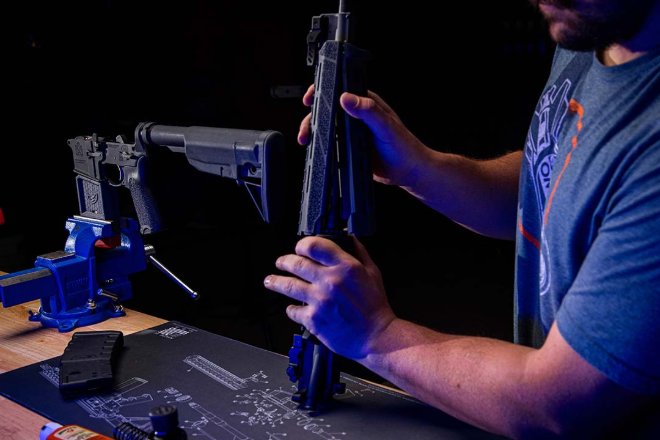
Step-by-Step AR-15 Disassembly Guide
As mentioned above, this process will be the same for any AR-15 and AR-10 system. There are additional steps that you will need to follow to clean a piston system, but we will not be covering that today.
We are going to check that the firearm is clear and that the ammo is not near us. Remove the magazine from the gun and make sure that the chamber is empty. I personally rack the charging handle a few times and then visually check that the chamber is clear. Then you are going to close the bolt.
The first thing that we need to do is push out the back take-down pin. This will separate the upper from the lower just enough that we can take out the Bolt Carrier Group and Charging Handle.
Pull on the charging handle, and the bolt carrier group will follow. We can now set the AR-15 off to the side of the mat.
Disassembling the Bolt Carrier Group (BCG)
Now we are going to break down the bolt carrier group (BCG). You are looking for a small pin, called the firing pin retainer, located around the middle of the BCG. You will need to remove this pin in order for the firing pin to fall free of the BCG.
Once you have removed the firing pin retainer and the firing pin, we need to remove the Cam Pin. This is easier if you have a small flat-head screwdriver to help remove the cam pin. After we remove the pin, the Bolt Assembly will come out. Just pull it out of the Bolt Carrier.
We have successfully taken down our AR-15, and now it is time for cleaning.
How to Clean, Lubricate, and Reassemble Your AR-15
We are going to be using CLP for cleaning, but these steps are compatible if you are not using a CLP. Starting with a bore brush, we are going to apply some CLP to our brush and push it through. The key is to push it in the same direction that the bullet travels.
I then switch to my star brush and make sure that I clean out the chamber. After that, I will switch and put some cleaning pads through until they come out mostly clean. I want them to be about 90% clean at the least. Once the barrel is clean, I will add some lubricant onto a cleaning pad and push that through a couple of times. Make sure that you don’t douse the barrel with oil because this can cause malfunctions.
Scrubbing the Upper and Lower Receiver
Add a few drops of your cleaner or CLP to a brush. I typically use an old toothbrush. We are now going to take our toothbrush and really scrub the inside of our upper receiver and lower receiver. Take a rag and wipe it down. If you are using CLP then there will be a thin film of oil left, which is exactly what you are looking for. If you are just a cleaner, then make sure there is a thin layer of oil left on the upper and receiver. A dry gun will not work, but an overly wet gun will also not work, so be mindful.

Cleaning and Lubricating the Bolt Carrier Group
Now that the Upper and Lower Receivers are taken care of, we are going to focus on the Bolt Carrier Group. We already went over how to take apart the bolt, so if you skipped that step, make sure to check that out above.
I like to start with my brush and scrub everything down; this will break the carbon build-up, and then I take my rag and wipe it down. Now we know that we have told you to be careful how much oil you are putting on your AR, but it’s very crucial that you do not over-oil the bolt; it can cause your firing pin to have light primer strikes.
Reassembling Your AR-15
Now, we just need to reassemble our AR. Just reverse the process that we did with taking it down. Then do a function check, make sure the chamber is clear and dry fire the weapon to ensure that you put it back together correctly.
Conclusion
It is important to remember that your AR-15 is a tool. Whether that is for hunting, self-defense, or stopping a tyrannical government. If you only shoot 20 rounds, you don’t need to clean your rifle. We recommend cleaning your AR every 500-1000 rounds. If you leave it out in the elements or it gets soaked by water, then clean it accordingly. If you have any questions on how to clean or disassemble an AR-15, reach out to us, and we will answer them.
Frequently Asked Questions
Do I need to clean it after every use?
Not necessarily. If you just fired a couple of magazines at the range, you're fine skipping a full clean. Just wipe it down and keep it lubricated.
Can I use WD-40 instead of gun oil?
No. WD-40 is a water displacer, not a lubricant. Use a dedicated gun oil or CLP (Cleaner, Lubricant, Protectant).
What happens if I overlubricate?
Too much oil can attract dirt and carbon, and in the case of the bolt, may cause light primer strikes. Aim for a light coat, wet, not dripping.
Can I clean my AR-15 without any tools?
You don’t need specialized tools for basic cleaning. A flathead screwdriver can help remove the cam pin, but that’s about it.
What if I skip the lower receiver cleaning?
Neglecting the lower can lead to trigger grit, sluggish reset, or hammer issues over time. It doesn’t take long, just give it a quick brush and wipe.


